Troubleshooting PSTN Behaviour by Comparing Call Recordings and Packet Captures
Your companies telecommunications are only as good as your voice quality. Without good voice quality… well there’s always email.
Sometimes after you’ve corrected QoS misconfigurations, validated WAN and LAN behavior and validated your fixes you still have user complaints. In this blog post, we dive deep into techniques that allow you to analyze and measure the behavior of the PSTN, beyond your SIP termination points and into the public phone networks. In this specific example even call recordings showed good voice quality. However, we established that the issues were related to call latency. Normally there is no way to measure latency without the use of specialized tooling, but we developed the following technique.
There are a number of factors that contribute to poor voice quality. In this article, we discuss methods to troubleshoot and isolate voice quality issues outside of the network and on the PSTN using packet captures and call recordings. Packet captures are one of the most powerful troubleshooting tools we have.
Latency testing
The first step to perform a latency and quality assessment test is to have a recording of the call on the far side (in our case we used an android mobile phone configured to record calls). Local to the site we performed a capture on the switch mirroring ports for both the WAN and the new SIP gateway.
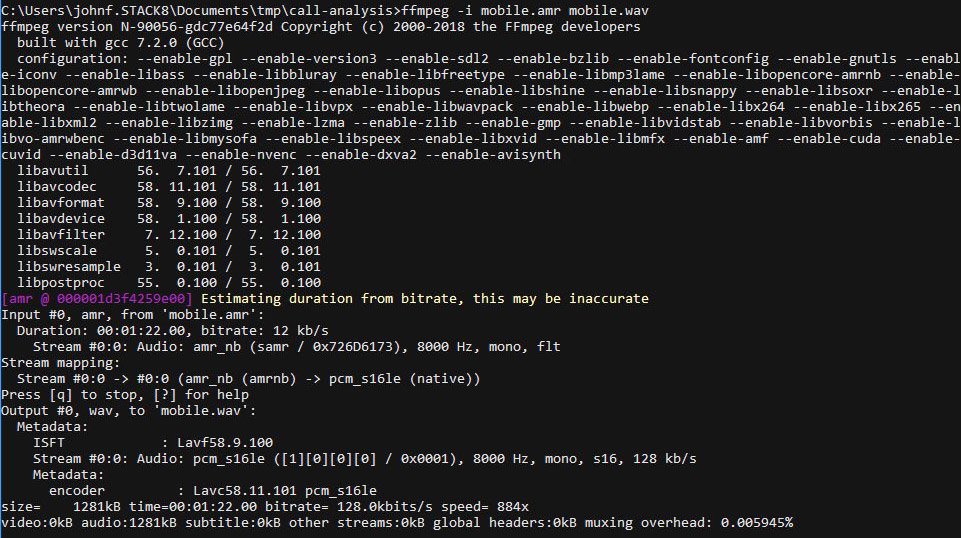
We used Audacity to compare the two audio streams, but first, we needed to get them into a compatible format. I used FFmpeg to convert the Android AMR recording to a WAV file:
ffmpeg -I mobile.amr mobile.wav
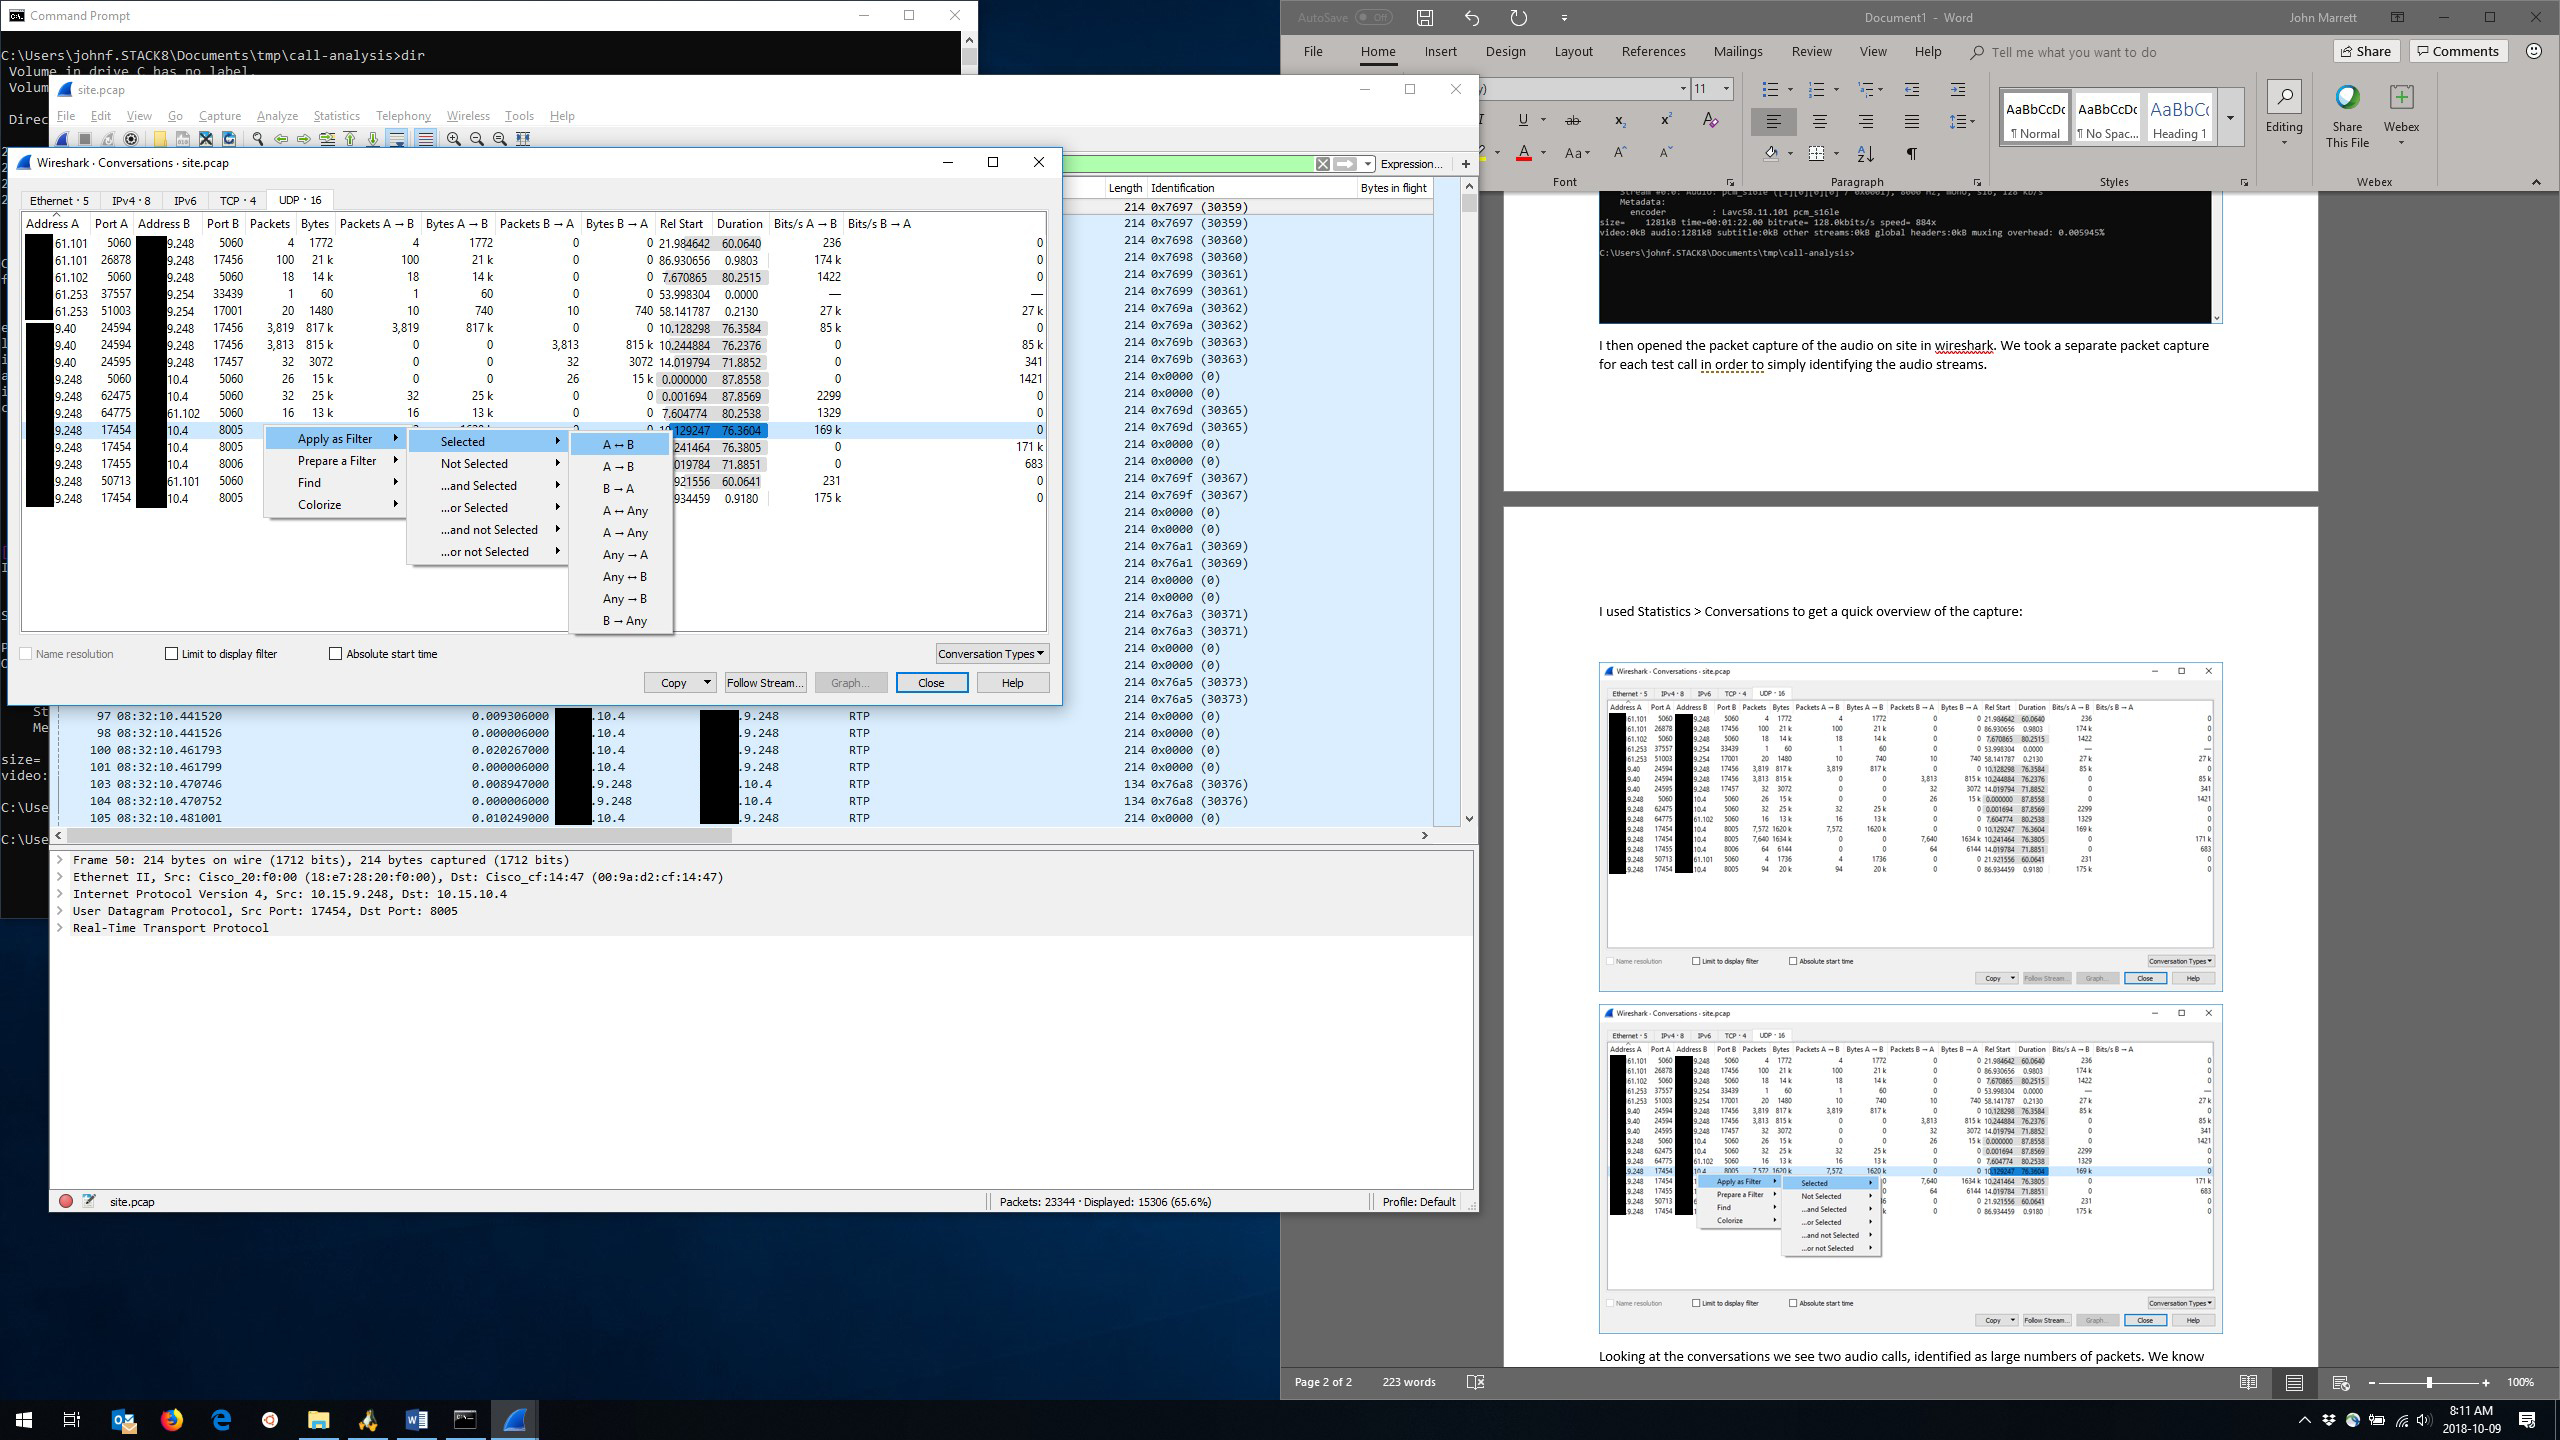
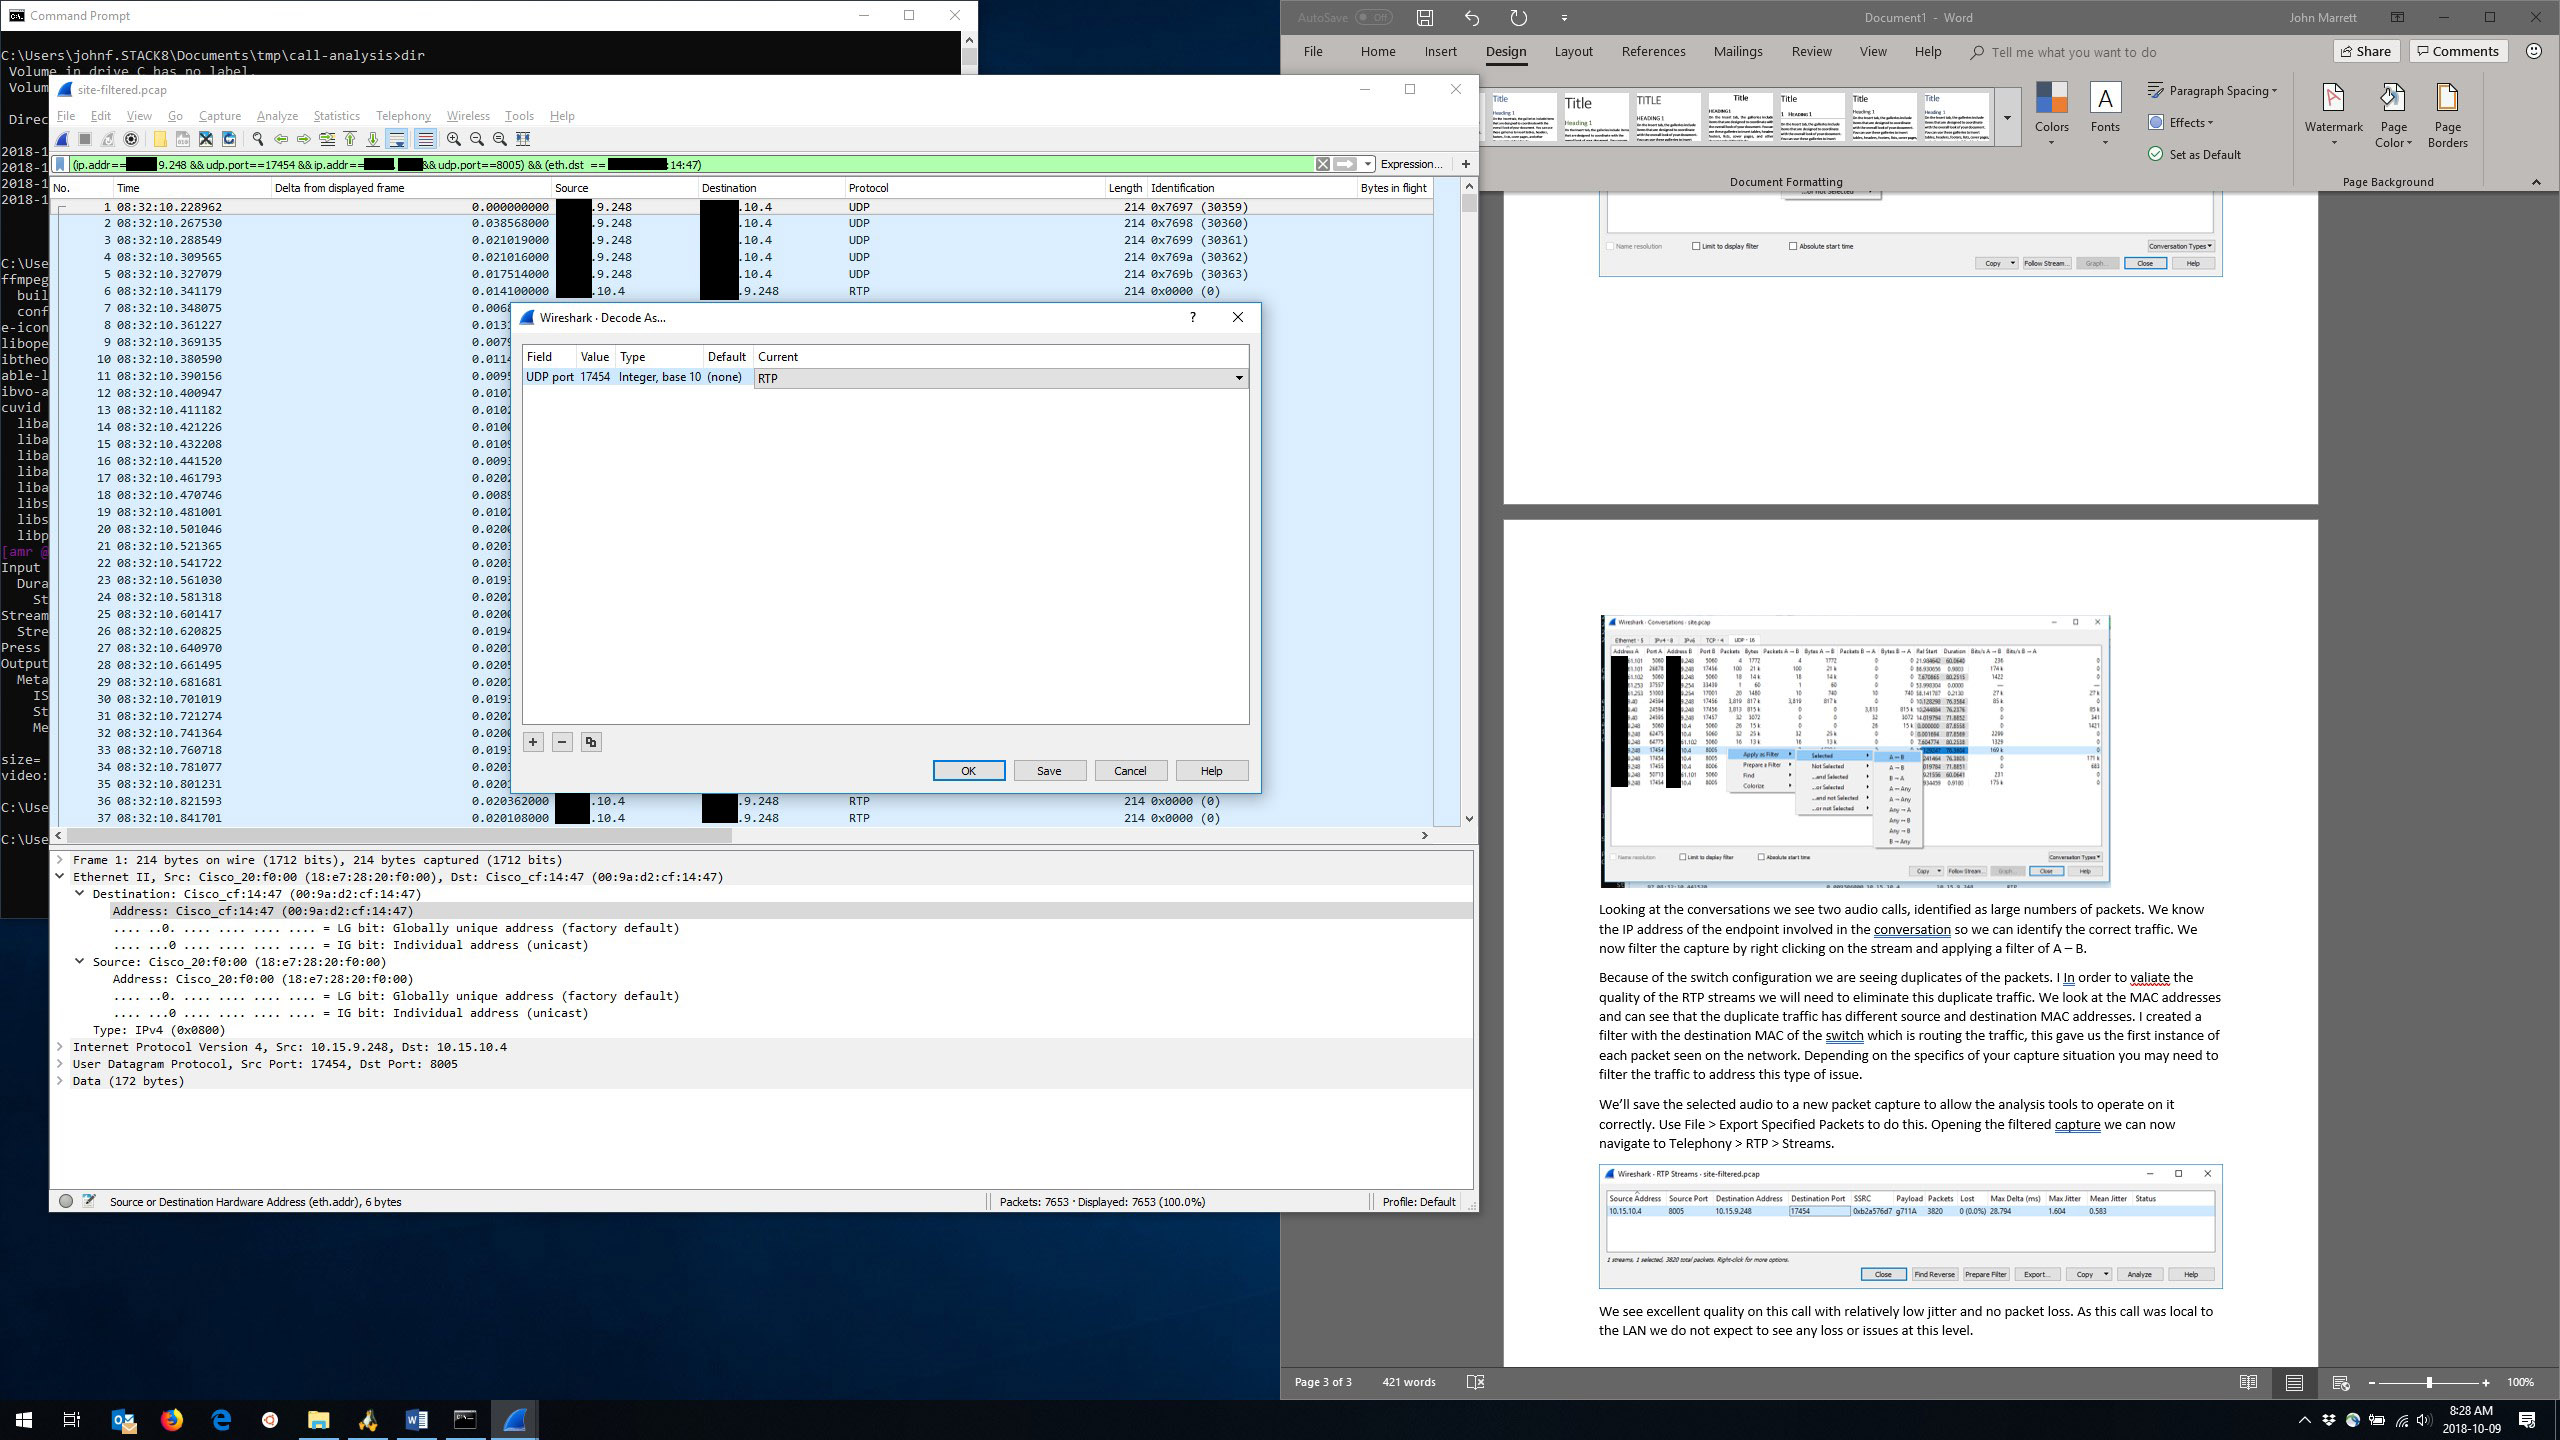
Next, we opened the packet capture of the audio in Wireshark. We were able to take separate packet captures for each test call in order to identify the audio streams.
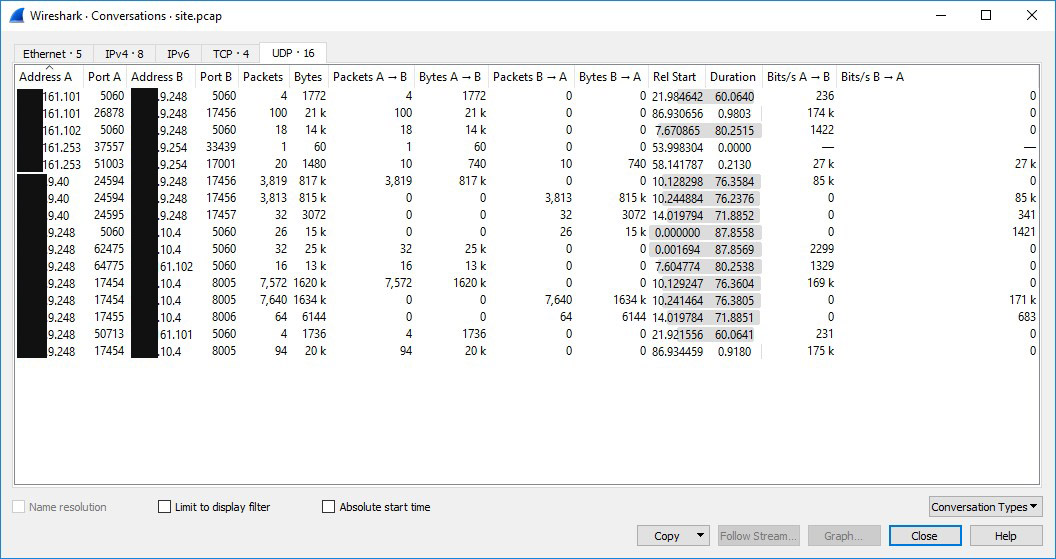
By using Statistics > Conversations, you are able to get a quick overview of the capture:
Analysis of the capture
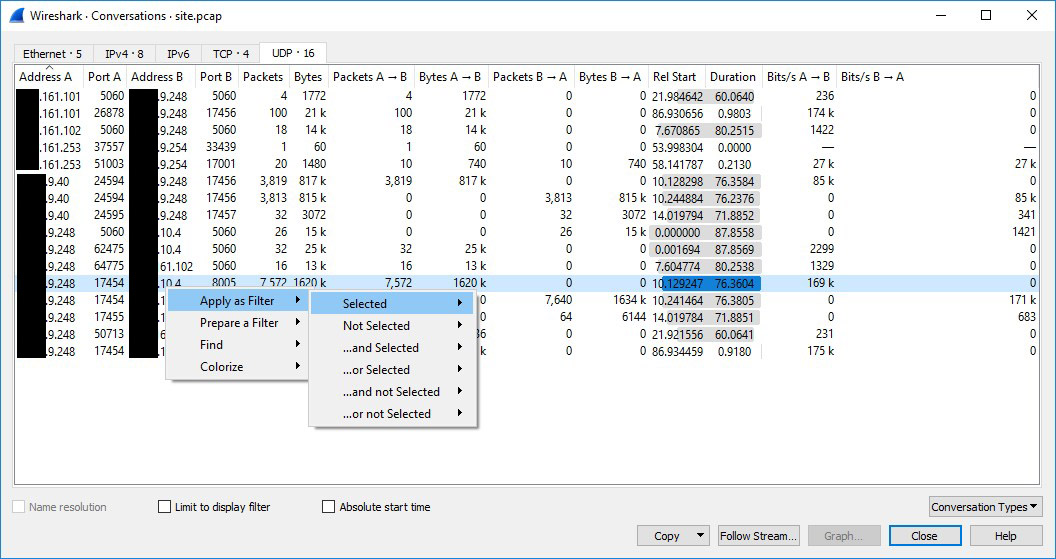
Analyzing the conversations, we see two audio calls, identified by large numbers of packets. We know the IP address of the endpoint involved in the conversation so we can identify the correct traffic. We now filter the capture by right-clicking on the stream and applying a filter of A – B.
Remove duplicate data
It is important to note that because of the switch configuration, we actually see duplicates of the packets. To validate the quality of the RTP streams, we must next eliminate this duplicate traffic. By looking at the MAC addresses, we can see that the duplicate traffic has different source and destination MAC addresses.
By creating a filter with the destination MAC of the switch which is routing the traffic, will us the first instance of each packet seen on the network. Depending on the specifics of your capture situation you may need to filter the traffic to address this type of issue.
Next, we save the selected audio to a new packet capture to allow the analysis tools to operate on it correctly. Use File > Export Specified Packets to do this.
Opening the filtered capture reveals that one of the media streams is no longer being identified as RTP.
- Right-click on this packet and choose decode as to adjust the encoding to RTP by changing the decoding in the “Current” window.
You can now navigate to Telephony > RTP > Streams
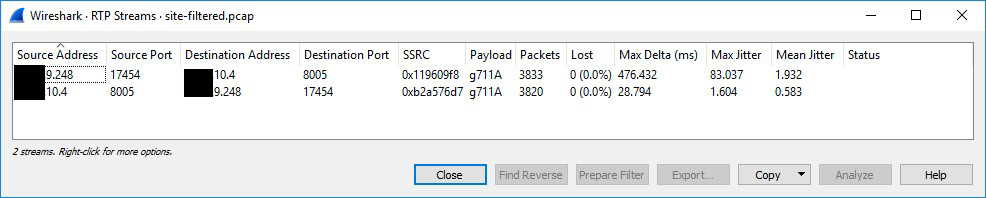
We see an unusually large max delta figure. However, when we proceed into the stream analysis, this appears to be limited to a brief period of time at the start of the capture.
We can now examine the audio of the recording using play streams. After a quick listen to confirm everything is decoded correctly, save the audio to a file. Wireshark presently supports a limited subset of codecs. However, it is able to save the raw audio stream for unsupported codecs, and you can transcode them to a supported audio format.
We save the audio data to a file using the save button at the bottom of the stream analysis and saving the unsynchronized forward and reverse audio.
We now have the audio for the call in both directions and are ready to open it in Audacity.
- Open Audacity and choose File > Import > Audio
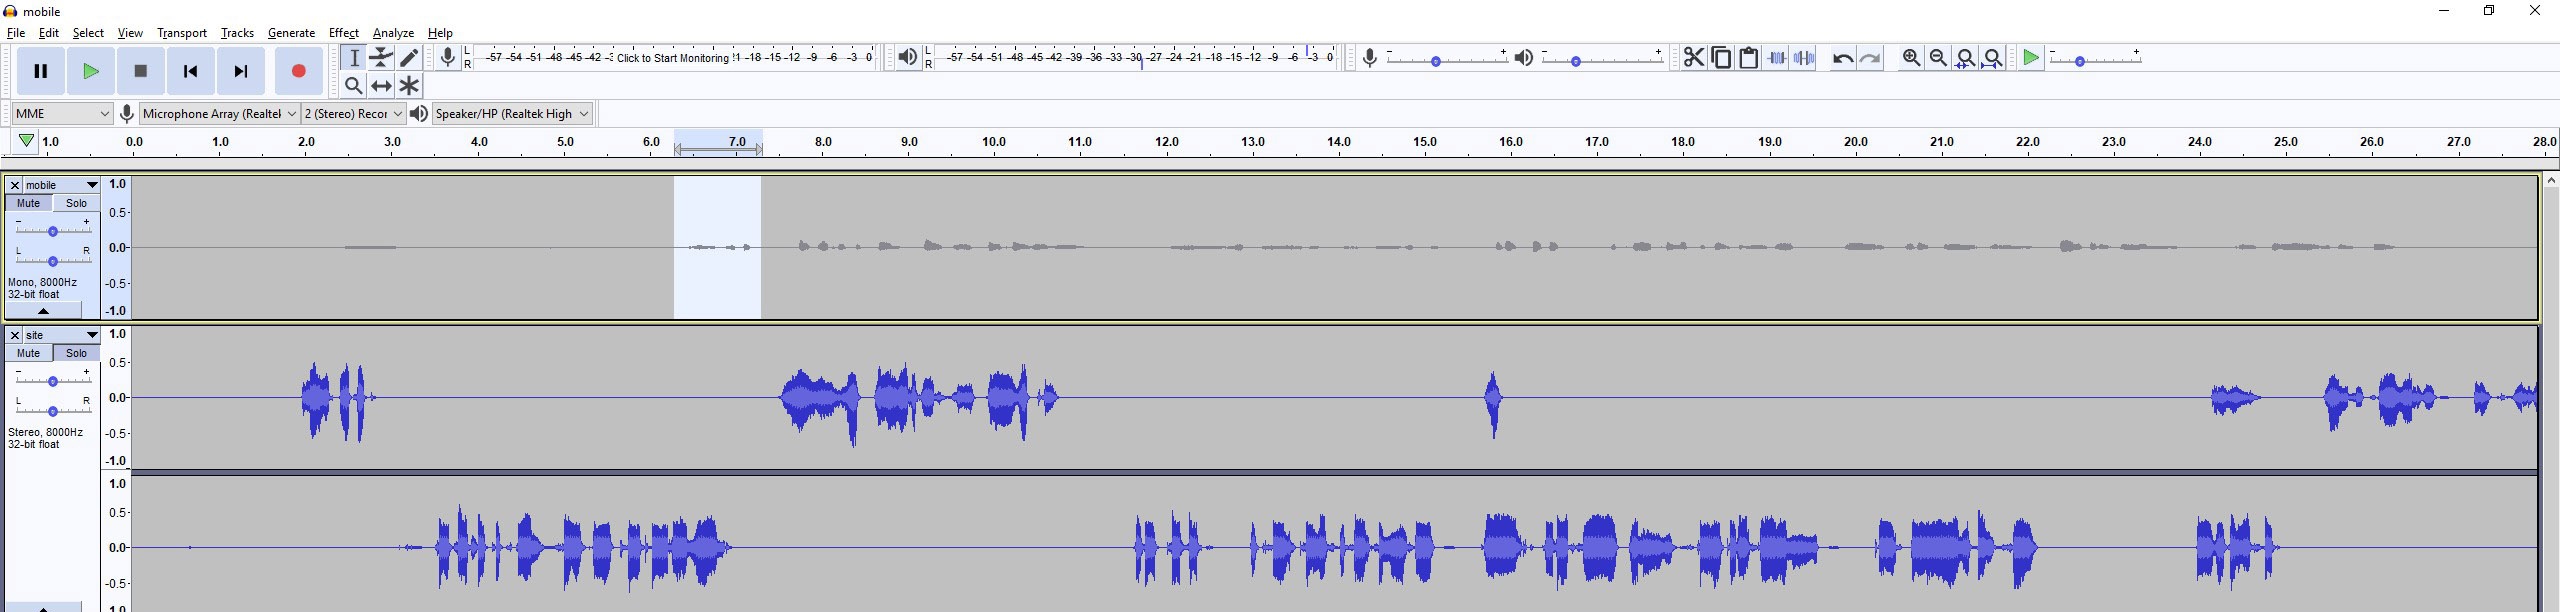
We now have the two phone calls inside Audacity; we are going to align the audio to get the two recordings to overlap each other for one side of the conversation. This will let us measure the latency of the phone call.
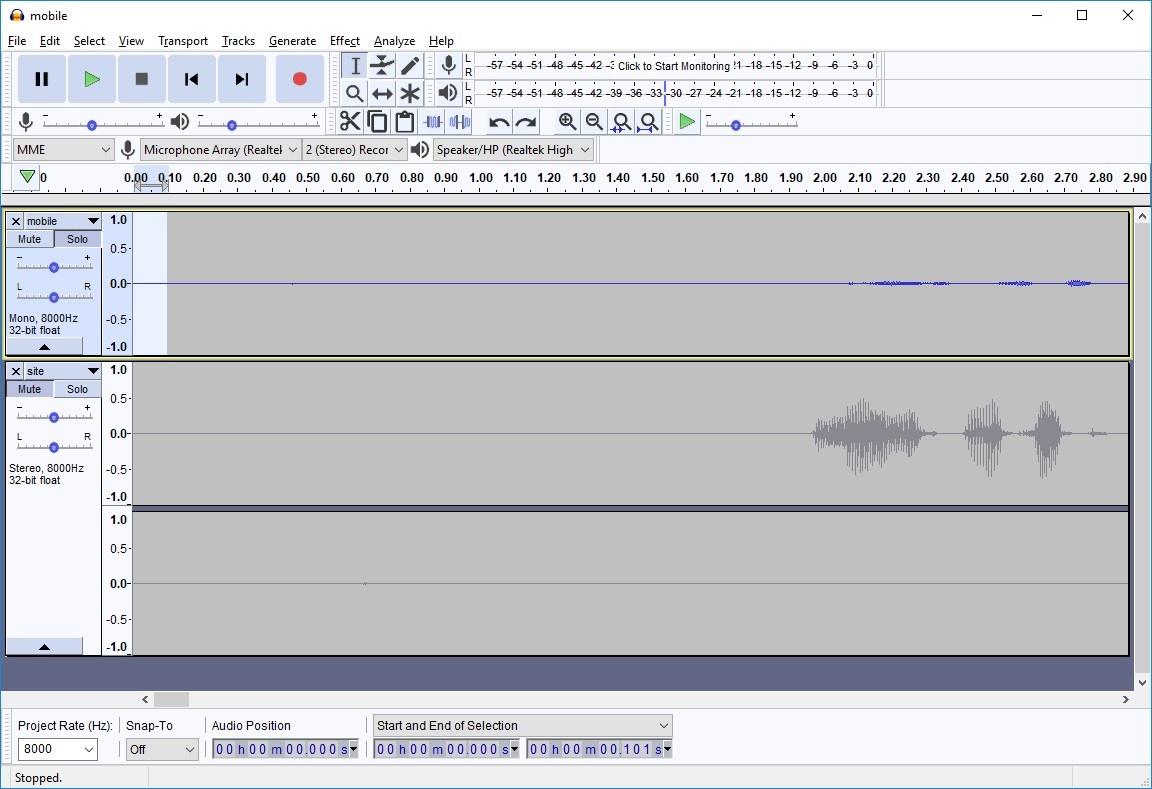
Here is the initial view of the phone call:

The recording from the mobile end (top sample) is a bit longer than the packet capture (bottom two samples, one per audio direction). Using the solo button, we listened to each capture in order to identify the overlapping section. (light blue):
And the same in the on-site call recording:
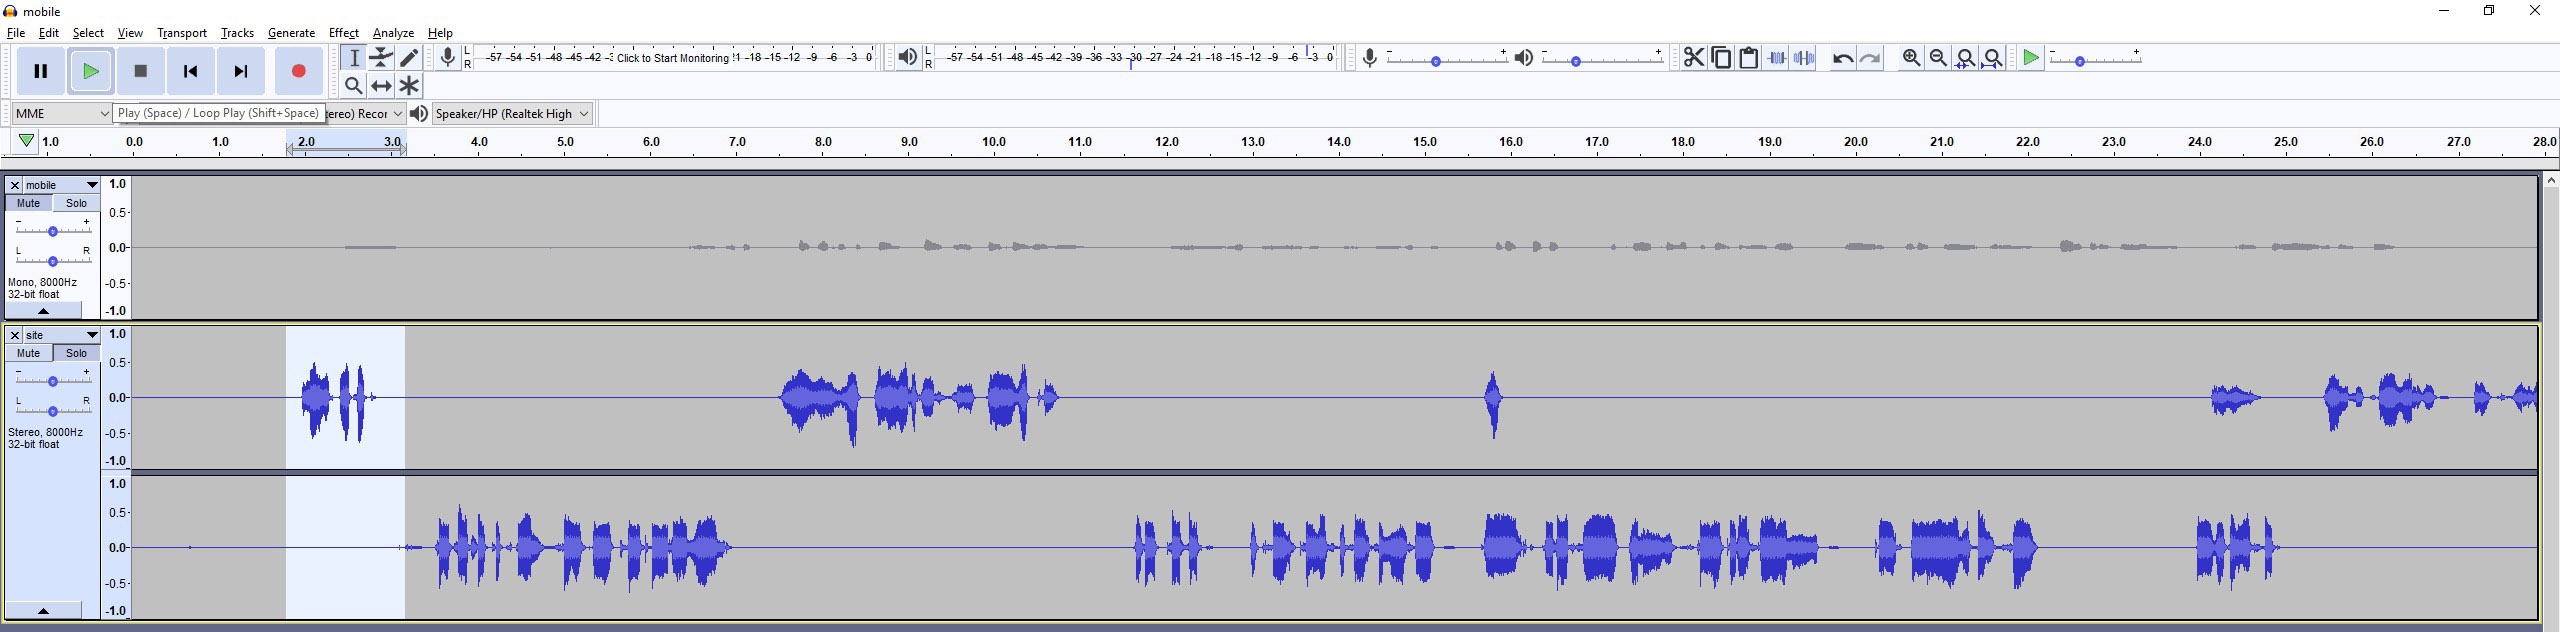
To align these two files, you will need to:
- Cut off the start of the audio in the first sample. (Select a region and press delete).
- As there’s a large difference in timing, you will need to get it millisecond perfect. Zoom in (ctrl+1).
- Measure if any discrepancy exists between the two files.
- Listen to two files to ensure they are properly synchronized.
We now have the audio synchronized on one side. This isn’t actually how the call works in real life; there is a delay from when it’s transmitted to being received, we will see the total round trip time expressed in the delay between transmission and reception of the traffic on the far side.
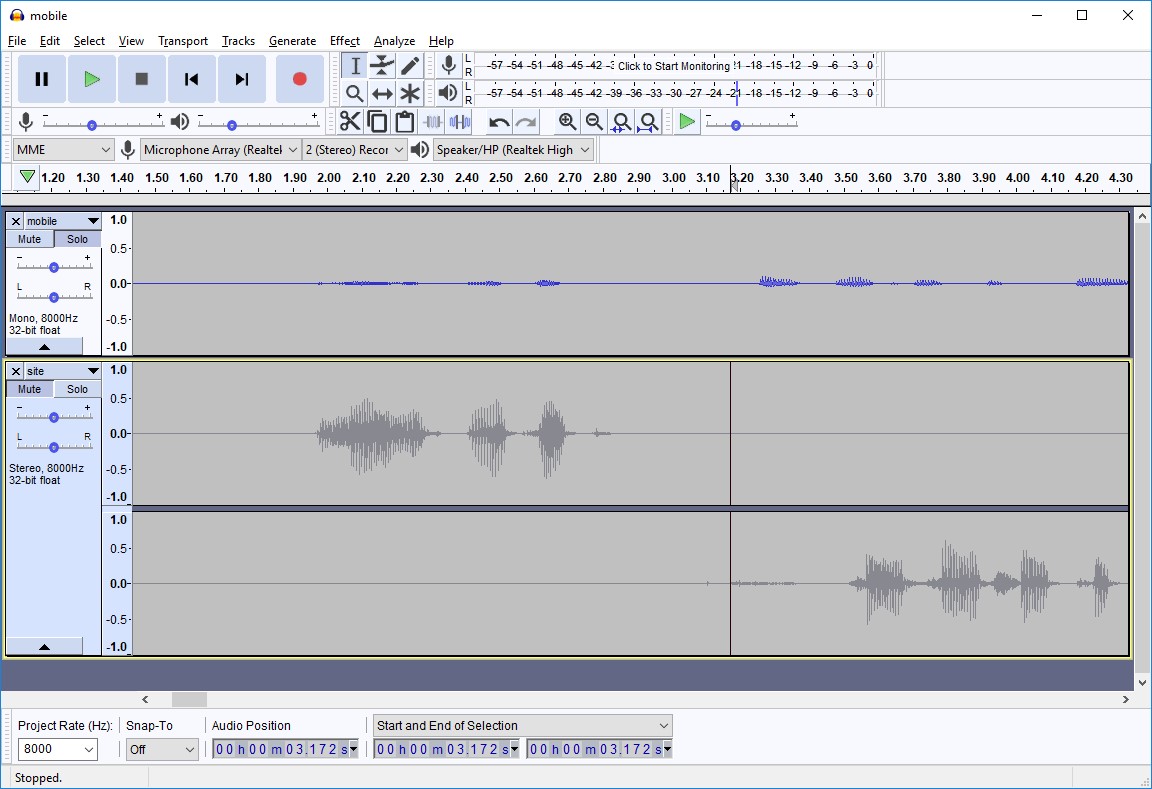
For our example, we see the reply at 3.257s in the first sample and 3.518 in the second. When we subtract the two numbers and divide by 2 to look at the estimated one-way audio latency, we get a value of 0.130s. 130 ms of latency is a good value and represents a huge improvement from the numbers of approximately 300-500 ms with the previous entry and regional number provider.


Ready to take your unified communications from headache to hassle-free?
No throwing darts at proposals or contracts. No battling through the back-end. No nonsense, no run-around.