Sending CUPI requests to Cisco Unity using Postman
 Sean McDade, Product Owner
January 24, 2017
Sean McDade, Product Owner
January 24, 2017
The Cisco Unity Provisioning Interface (CUPI) allows a UC Administrator to programmatically perform moves, adds, and changes to various entries in Cisco Unity (users, contacts, distribution lists, and call handlers) through a simple REST API.
The following article will provide instructions on how to perform a request to the CUPI API using Postman.
Prerequisite: Administrator Account in Cisco Unity.
To use the Unity’s CUPI API, you will require an Administrator Account. If you already have an Administrator Account in Cisco Unity, you may skip this section.
Section 1) Creating an administrator account in Cisco Unity
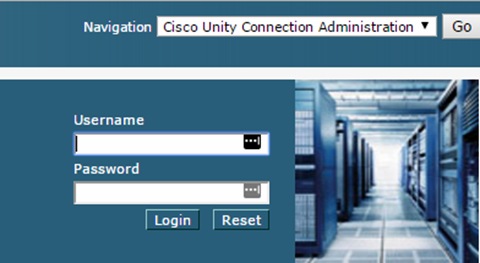
Step 1.1: Login to the Cisco Unity Connection Administration page.
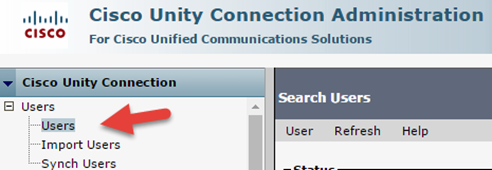
Step 1.2: Go to Users.
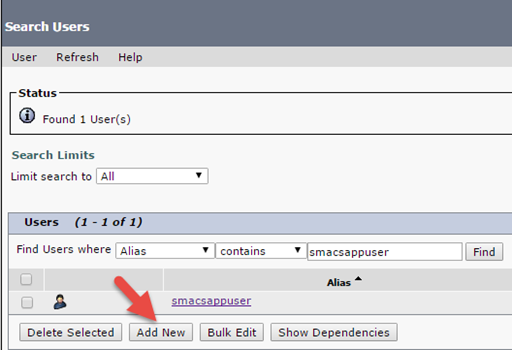
Step 1.3: Click on Add New.
Step 1.4: Click on the User Type dropdown and select the User Without Mailbox type.

Step 1.5: Click on the Based on Template dropdown and select the administrator template.
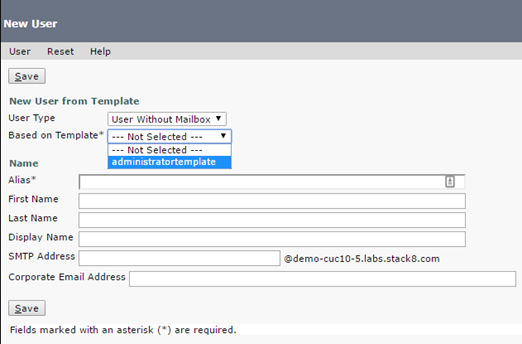
Step 1.6: Provide a new user alias.
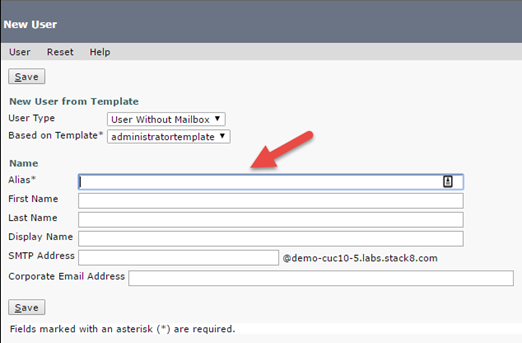
Step 1.7: Click Save.
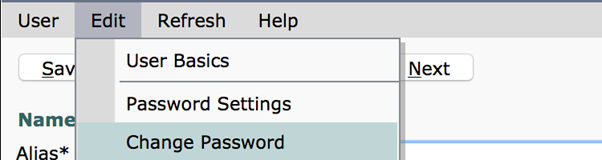
Step 1.8: Now that the user has been created, ensure to Edit — Change Password to provide credentials for your newly created account.
Section 2) Sending a CUPI request to Cisco Unity with Postman
For our example, we will request a user’s information using an account alias.
Refer to the Cisco Unity Connection Provisioning Interface (CUPI) API for the full list of possible transactions.
Step 2.1: Open Postman (Available at https://www.getpostman.com/)
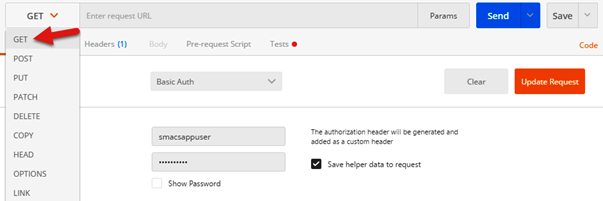
Step 2.2: Select GET from the request dropdown menu.
Step 2.3: In the URL tab, provide the URL to query the user by alias (replace the IP and alias with your values)
https://<ip-or-hostname-to-cuc>/vmrest/users/?query=(alias is alias)
Step 2.4: Go to the Authorization tab and select Basic Auth.
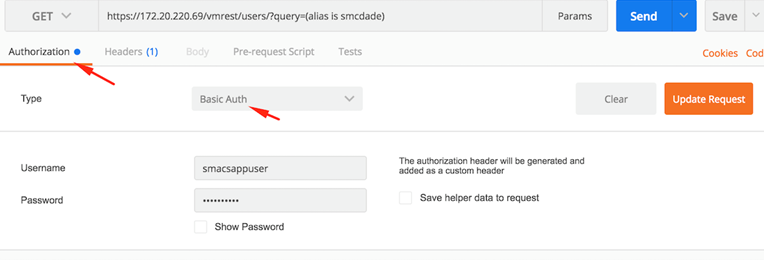
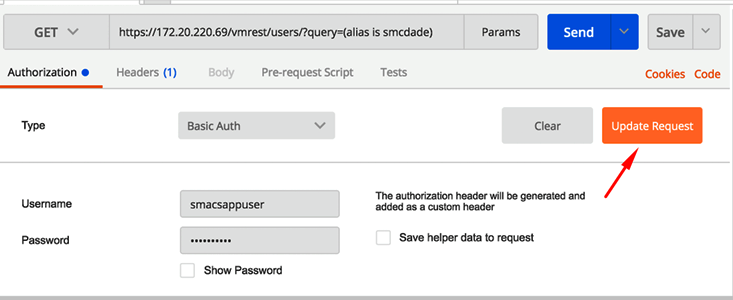
Step 2.5: Provide the credentials for the System Administrator user you created in Unity and click Update request.
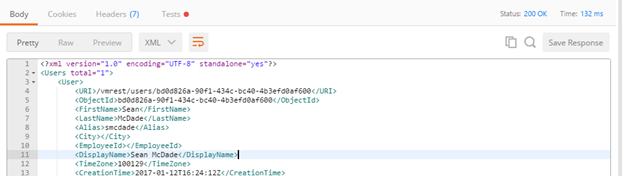
Step 2.6: Press Send and then review the returned XML response containing the details of the voicemail account.
Congratulations! You have successfully sent a CUPI API request to your CUC using Postman. If you are interested in building solutions to help your organization with their UC environment using CUPI, please feel free to reach out to our Software Solutions Team. Our team of experts uses AXL and CUPI extensively for a variety of software products, including SMACS our Stack8, Moves, Adds, and Changes Solution.
Ready to take your unified communications from headache to hassle-free?
No throwing darts at proposals or contracts. No battling through the back-end. No nonsense, no run-around.