How to Convert Cisco Phone to MPP and Register with Microsoft
 Raman Sharma
February 16, 2024
Raman Sharma
February 16, 2024
All on-premise Cisco phones need to be converted to MPP before they can be provisioned with Microsoft Teams or any other 3PCC
The Cisco Cloud Upgrader is a service that allows customers to easily upgrade/migrate the software on Cisco IP Phones so they can connect to Cisco WebEx Calling, Microsoft Teams or any 3PCC
Note:
- “Enterprise firmware.” MPP phone firmware does not work and is not supported by Cisco Unified Communications Manager.
- “MPP firmware can run on certain models of the 6800, 7800, and 8800 series. However, only the 7800 and 8800 series have the capability to run either MPP firmware or Enterprise firmware”
- Enterprise firmware to MPP firmware – eligible devices
Eligible devices with hardware versions are in this link
Migration licenses
The licenses are required to enable the calling services after migrating the firmware. For 3rd-Party Call-Controls, the licenses must be obtained from Cisco [License and Registration Portal]. Once you obtain the license files, please upload them here. The following types of files are allowed to be uploaded:
- A single file per phone(.lic extension)
- A bundle of license files(.zip archives with multiple .lic files)
Firewall/Proxy requirements
If you are using a firewall only, note that filtering traffic using IP addresses is not supported, as the IP addresses used by Cloud Upgrader are dynamic and may change at any time. If your firewall supports URL filtering, white list the following URLs:
- cloudupgrader.webex.com, ports: 6970/443
- activate.cisco.com, ports: 443
- activation.webex.com, ports 443
Network requirements
- DNS
- Internet connectivity from Voice VLAN
- DHCP Options(depending on the migration method of your choice)
Migration Methods
There are several methods to run the migration. We recommend 3 methods depending on your current deployment type:
- Bulk migration with CUCM (CUCM-registered phones)
- Bulk migration with DHCP (Phone’s staging facility)
- Manual migration (Lab/PoC/Several devices)
Requirements
- The phones you intend to migrate should be registered with CUCM over an ethernet connection.
Steps
Step 1 Navigate to CUCM https:///cucm-server
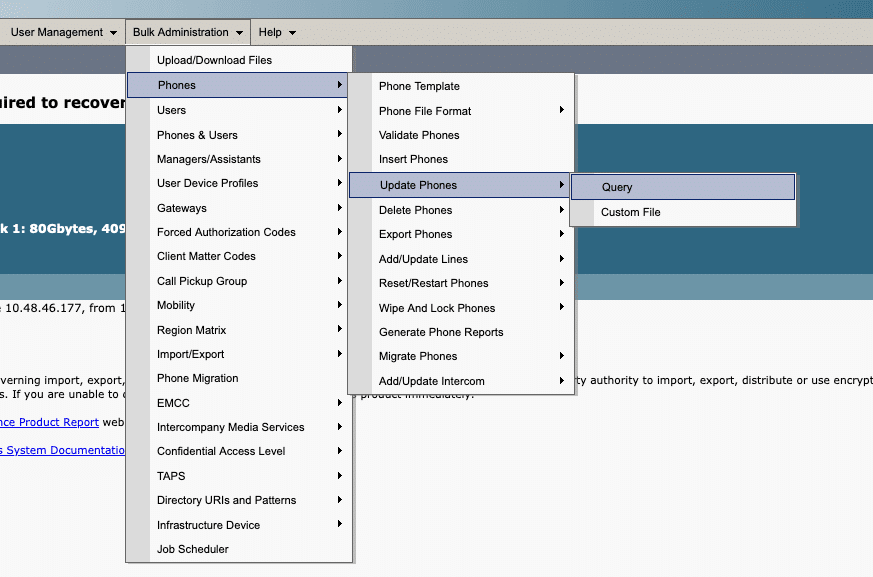
Step 2 From Cisco Unified CM Administration, go to **Bulk Administration → Phones → Update Phones → Query
Step 3 Filter per phone model and optionally other attributes to list the phones you want to migrate. **Please note that it’s mandatory to filter per Device Type; otherwise, the relevant settings may not be displayed.
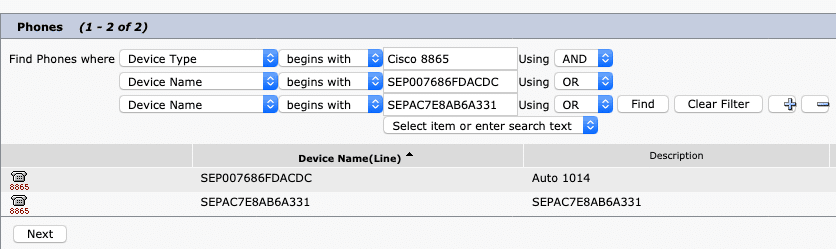
Step 4 Click Next
Step 5 Select **Apply Config
Step 6 Configure Load Server to cloudupgrader.webex.com!

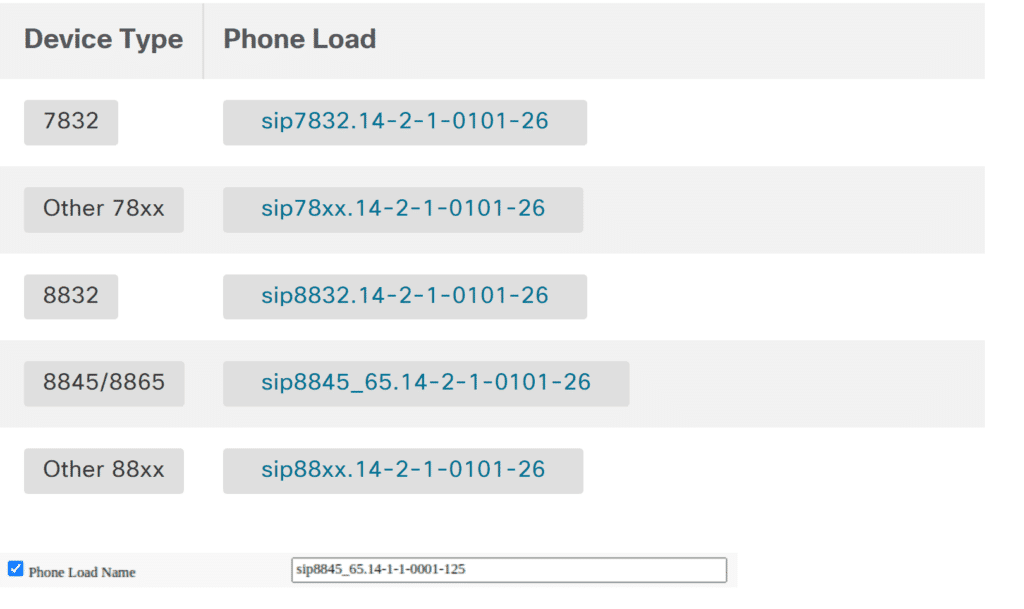
Step 7 If phones are running 14.1(1) or higher, skip this step and proceed to Step 11; otherwise, configure Phone Load according to the table below:
Step 8 Scroll down and select Run Immediately
Step 9 Click Submit
Step 10 As soon as the job is completed, wait for all phones to upgrade. You can use RTMT for monitoring.
Step 11 Proceed to the second upgrade and repeat Steps 2 – 10 using the different Phone Load as per the following table:
Device Type Phone Load
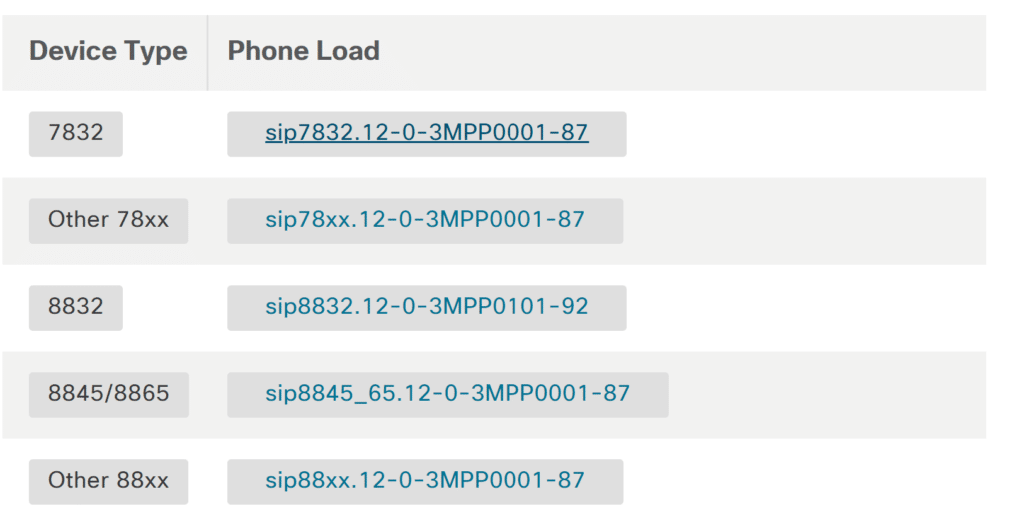
Step 12 Wait for all phones to upgrade, the migration is complete, and phones will run MPP firmware.
Manual and DHCP methods:- Cisco.com Login Page
Register a Cisco MPP Phone to the Microsoft Teams SIP Gateway
Provisioning
There are two different ways to configure the provisioning URL onto the phone.
Either automatically via the DHCP Option or manually on the Web-UI of the phone.
Automatically through DHCP
- Create a DHCP option 150, 43, or 66 and put in one of the URLs
- EMEA: https://emea.ipp.sdg.teams.microsoft.com
- Americas: https://noam.ipp.sdg.teams.microsoft.com
- APAC: https://apac.ipp.sdg.teams.microsoft.com
- Connect the Phone to the local network. The phone should then get the URL itself.
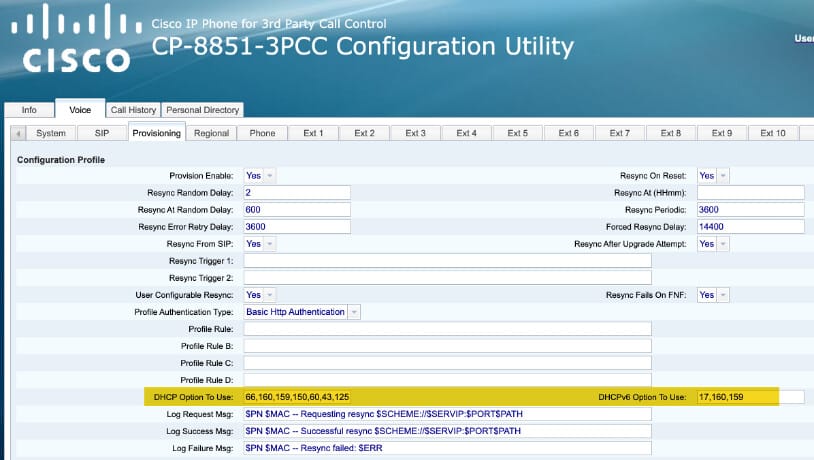
If you already have an Option150 configured, which you still need because you’ve also an existing CallManager environment, you could either use Option66, which is by default configured as the first option to look for on the MPP phones, or you can change the options and the sequence on the Web-UI under “Provisioning”:
Manually on the Phone Web-UI
- Connect the phone to the local network
- Open the Web-UI of the phone, change to the “advanced” mode, and go to “Provisioning”
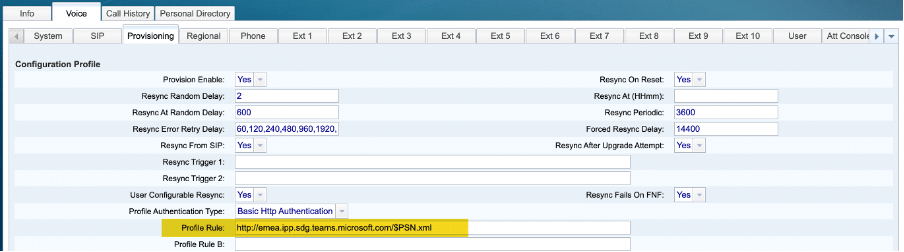
Here you could also add one of the supported languages into the URL to have the phone in another language than English.
Add the /lang_fr between the URL and the /$PSN.xml. For example, to use the Phone in French, use this provisioning URL:
https://emea.ipp.sdg.teams.microsoft.com/lang_fr/$PSN.xml
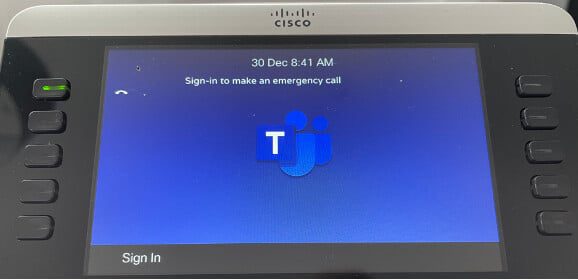
Login into MSFT
After the phone is provisioned for Microsoft Teams, you can start the registration on the phone.
- Press the Sign In softkey
- You will then get a Pairing Code, which is time-sensitive. If it runs out of validity, you get a new one by pressing the “Update” key.
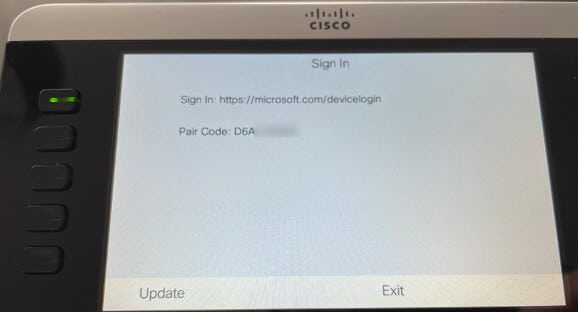
- Go to www.microsoft.com/devicelogin and put in the Pair Code
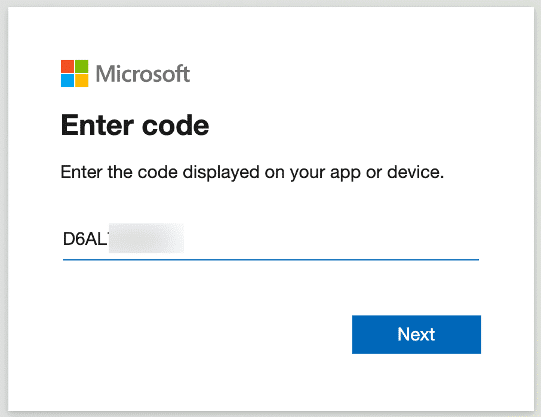
- You will get a prompt to put in your MSFT Credentials
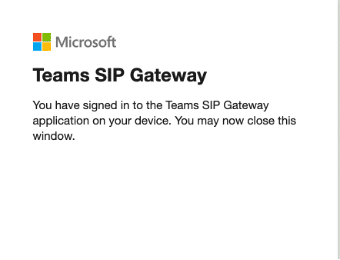
- After a successful login, the phone is registered to the SIP Gateway
Credit:- Cisco,Collabeer
Ready to take your unified communications from headache to hassle-free?
No throwing darts at proposals or contracts. No battling through the back-end. No nonsense, no run-around.